How to Build a Sleeper Retaining Wall
8 October 2018
By Jamie Dobinson
If you enjoy working outdoors and are confident with your tools, a sleeper retaining wall is a rewarding project to take on. This is a simple guide to follow, first written by Jamie in 2018.
It may not be the only way to build one, but it is probably the most approachable for a keen DIYer. Other materials and methods are available. Here we focus on a straight sleeper wall.
Why a sleeper retaining wall
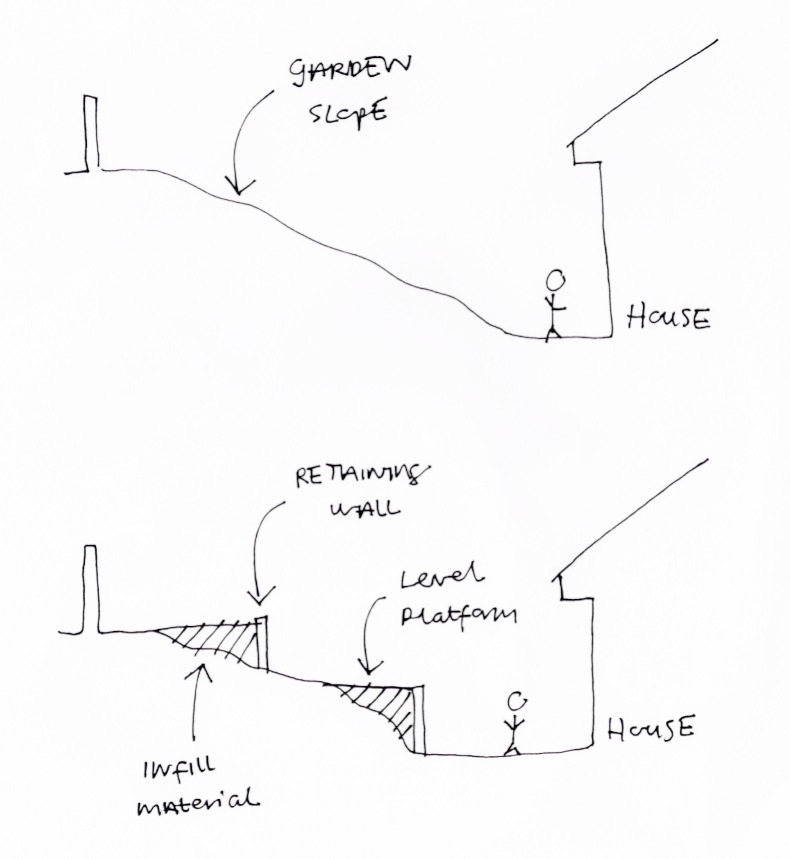
A retaining wall splits the levels within a garden and works best on a slope. It can divide spaces and create more usable, accessible platforms. Walls can be adapted to include seats, planting beds and steps, but this guide sticks to the basics: a straight timber wall.
Tools
- String line and pegs
- Spade and shovel
- Digging graft
- Post hole grabs
- Wheelbarrow
- Tape measure
- Spirit level
- Club hammer
- Drill and drill bits
- Hand, electric or chain saw
- Carpenter's pencil and square
- Sander or planer
Materials
Your local builders' merchant should stock everything you need.
- Sleepers
- Cement and ballast, or Postcrete
- Fixings: landscaping screws or bolts
- Perforated drainage pipe
- Pea shingle
1. Site analysis
First decide where the wall will go. In a small garden the answer may be obvious; in a larger one it pays to think it through. How will the wall improve the space? Consider budget, height, length, material durability, shape, purpose, style of finish and your own skill level.
As with every building project, cost will shape most of these decisions. Set your budget and work out what you can achieve with it.
Choosing your sleepers
Prices below are from 2018, when this guide was first written, and will have risen since.
Softwood. The most affordable option, at around £18 to £23 per sleeper in 2018. Softwood is lighter and easier to cut, which makes construction simpler. Always buy treated timber, or the wood will soon rot. Softwood sleepers tend to be straight and accurately sized, so they suit a clean, contemporary line on a tighter budget.
Reclaimed railway sleepers. Mid-range in price, at around £20 to £25 each in 2018. They are darker and full of character, but may still carry tar or metalwork from their past life and can be oily on a hot day, so never use them for seating.
Oak. Our recommendation for durability, character and quality of finish, at around £30 to £40 each in 2018. Oak is heavy and harder to cut and drill, which reflects its strength as a retaining wall. Inspect each sleeper, as some can be slightly bowed or vary in size. Over time oak weathers to a beautiful silvery grey.
Once you have settled on the location and size, order your materials and get started.
2. Excavation
Dig back the existing bank to create a clear working space for the new wall, using a tape measure for accuracy and a spirit level to keep the base as level as possible. For larger areas, consider hiring a mini digger. Pile the soil to one side: it will be reused to backfill behind the wall and create a level platform, a method known as cut and fill.
3. Setting out
Set up a string line to keep the wall straight. For a curve or another shape, mark the ground accurately with line marking spray.
4. Laying the first sleepers
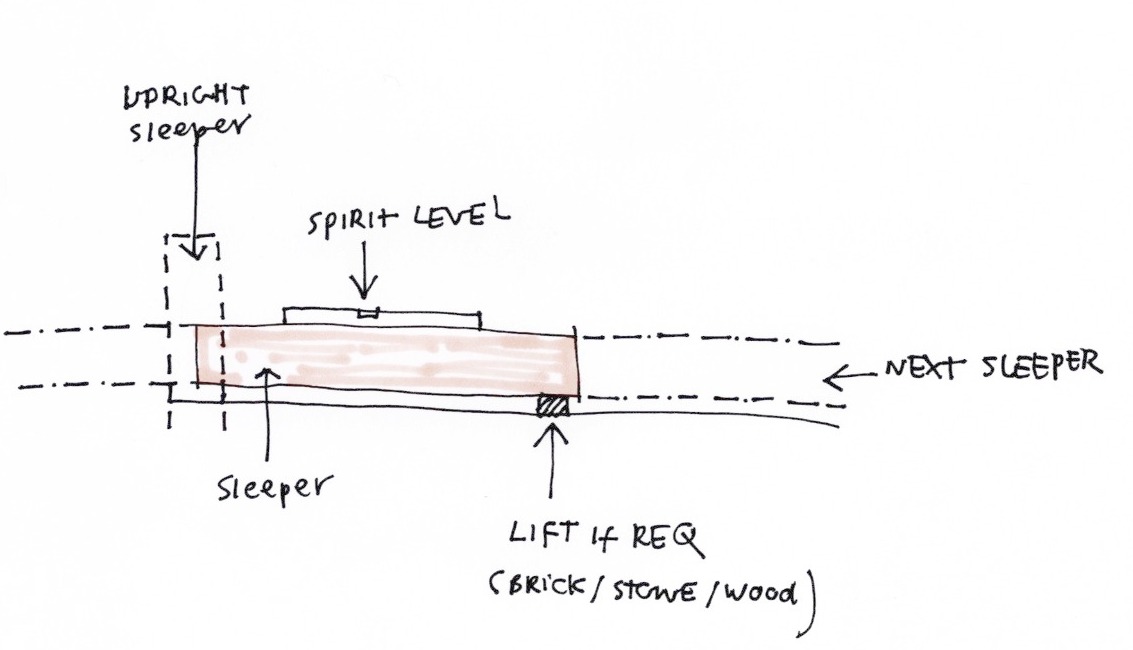
Lay the first sleeper horizontally along the string. Check it is level with a spirit level; if one end sits low, lift it temporarily on slate, brick or stone. If the levels are badly out, dig or fill the ground to suit. Final levelling can be done once the uprights are fixed, so do not worry too much yet. Leave at least 150 mm between the wall and the bank for access later.
Continue laying sleepers in a row, tapping the ends with a club hammer so each sits tight against the next.
5. Digging the post holes
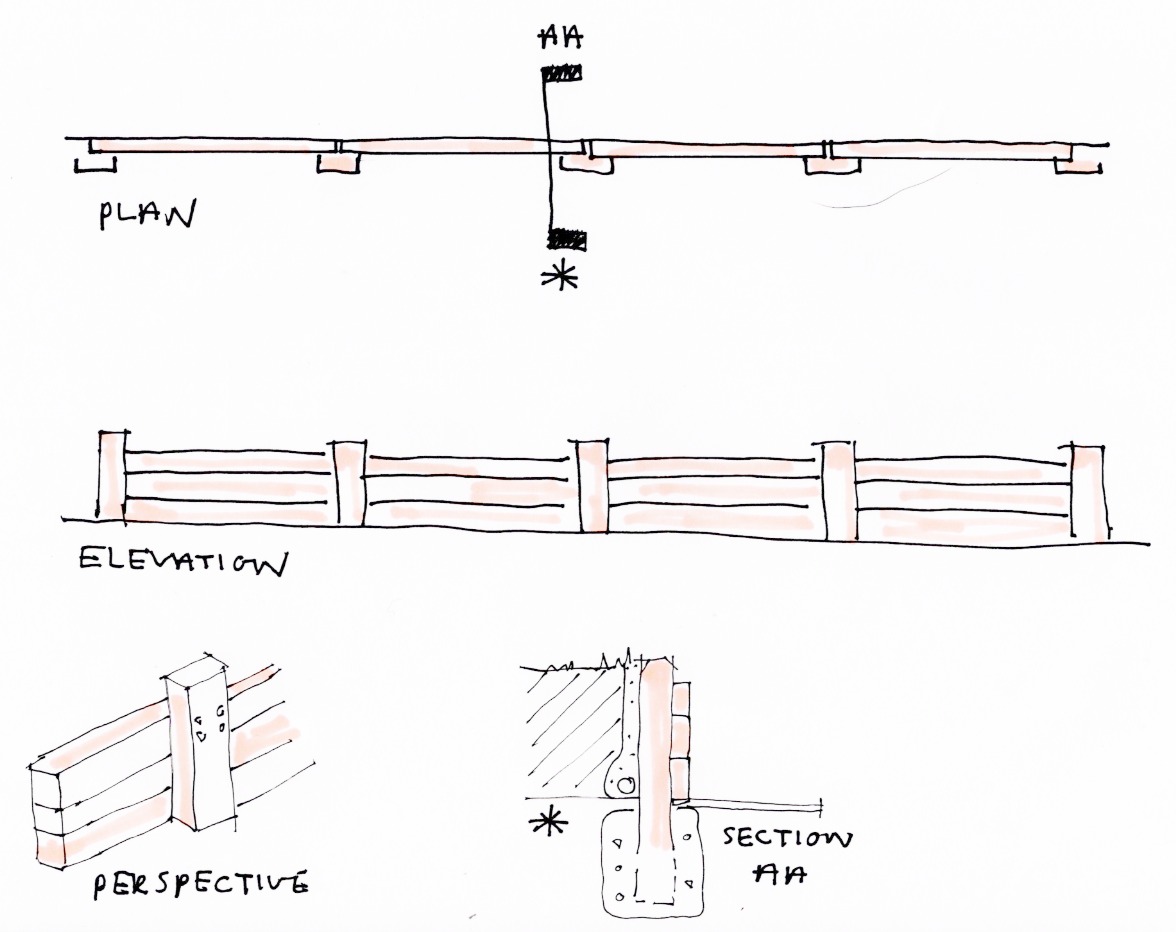
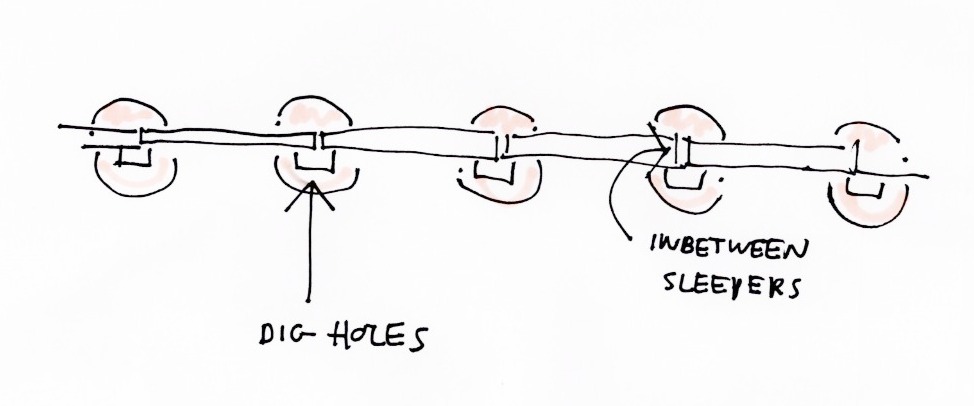
With the line established, dig the holes for the vertical sleepers at each joint. These are the main support for the wall and the fixing point for the horizontals. As a rule of thumb, at least a third of each upright should be concreted into the ground, so dig deeper for taller walls.
6. Building up the height
Working along the line, add further horizontal sleepers to the height you need. If the first course was level, the others should follow, but keep checking and adjust as you go.
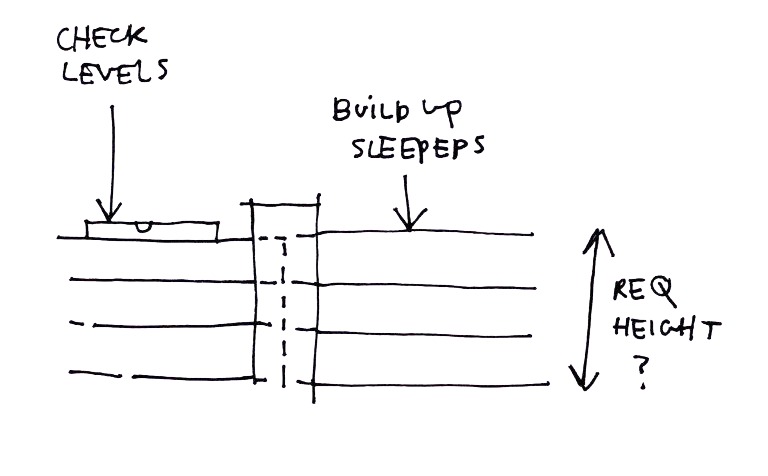
7. Marking the uprights
Before fitting the vertical sleepers, mark the fixing positions with a carpenter's pencil and square. Accuracy matters: fixings at different heights along a wall are hard to unsee. We recommend two fixings into each horizontal sleeper, kept well away from the edges. Once you have set the dimensions, repeat them on every upright and mark each hole with an X.
8. Pre-drilling
Pre-drill every hole, whatever timber you are using, to stop the wood splitting when the fixing goes in. Oak is tough to drill, so use a good quality bit.
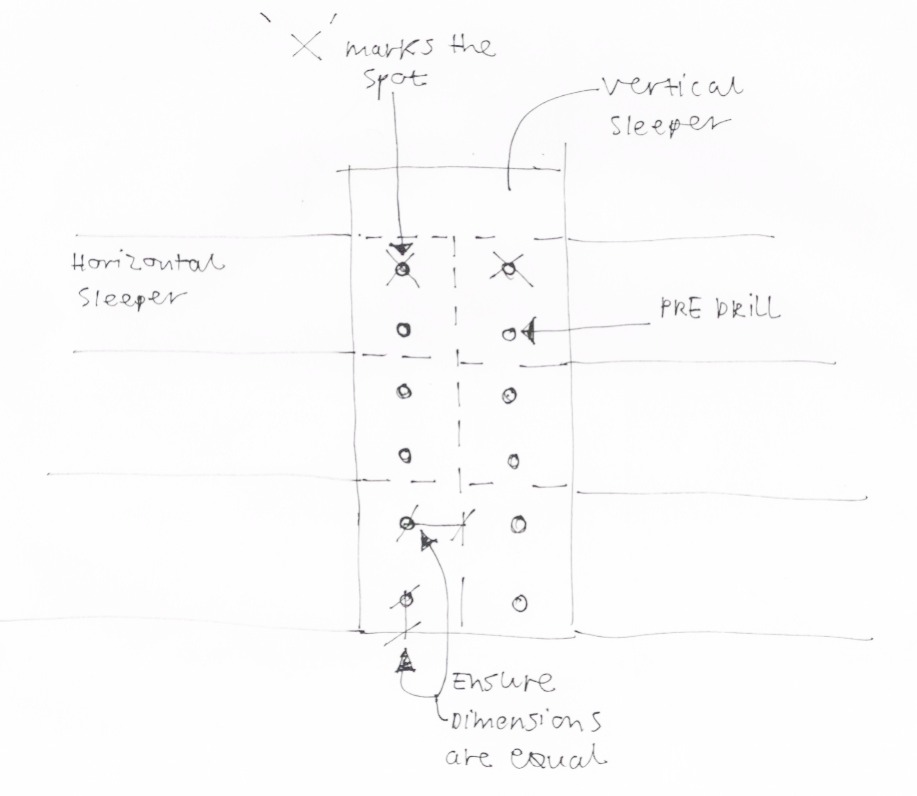
9. Fixing the uprights
Stand each upright in its hole, plumb against the horizontals. We usually fit them on the face of the wall, centred over each joint so both sleepers have an equal amount of timber to fix into. Drive landscaping screws through the upright into the horizontals. For a more substantial fixing, use threaded bar right through with a nut and washer at each end; this takes more skill to keep the holes straight and aligned.
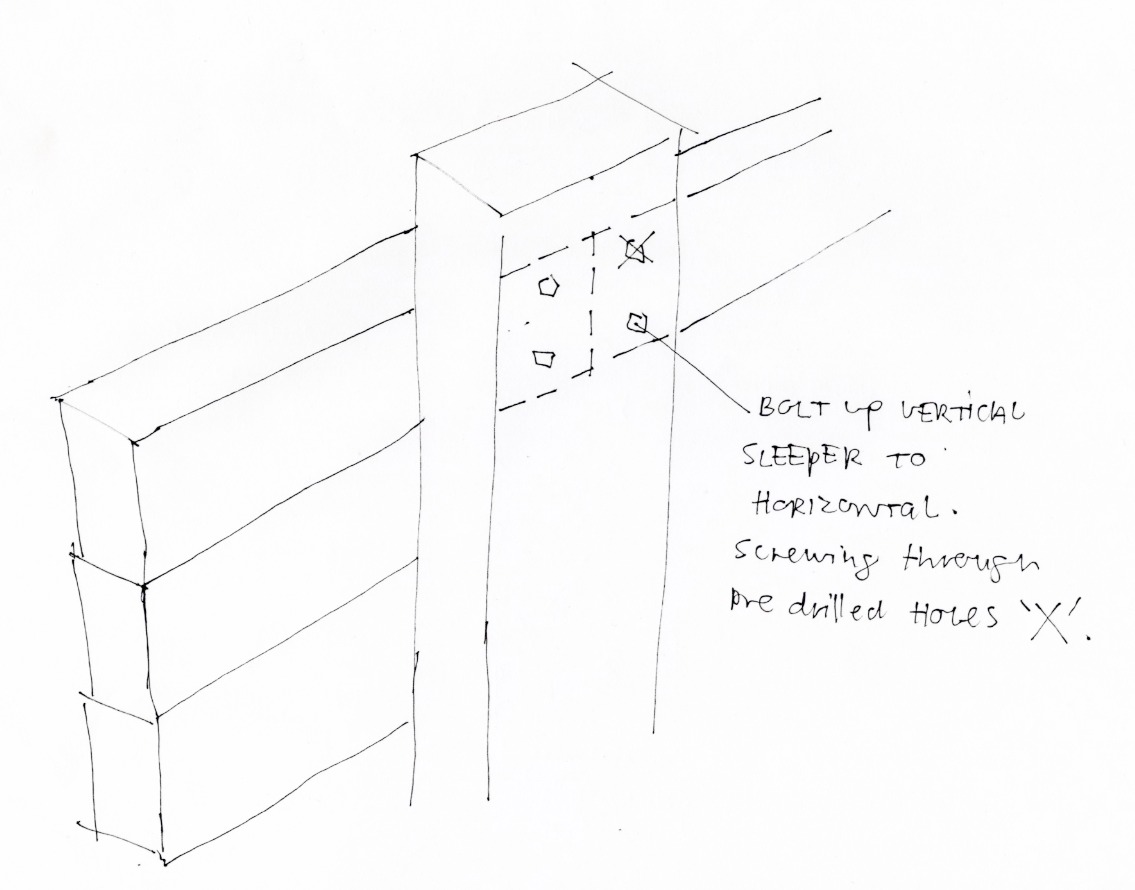
10. Concreting
Once everything is fixed, check the levels one last time and adjust if needed. Then fill the holes with concrete, either mixed from cement and ballast or rapid-setting Postcrete.
11. Drainage
It is good practice to lay a perforated drainage pipe along the base at the back of the wall, which is why we left a gap behind it. A diameter of 60 to 100 mm works well. Lay it to fall towards an outlet so water cannot build up pressure behind the wall or rot the back of the sleepers.
12. Backfilling
Wait two to three days after concreting before backfilling, so the pressure does not move the newly set wall. Pea shingle is ideal directly behind the sleepers. Beyond that, you will most likely use the soil set aside earlier to create a level area where there was once a slope.
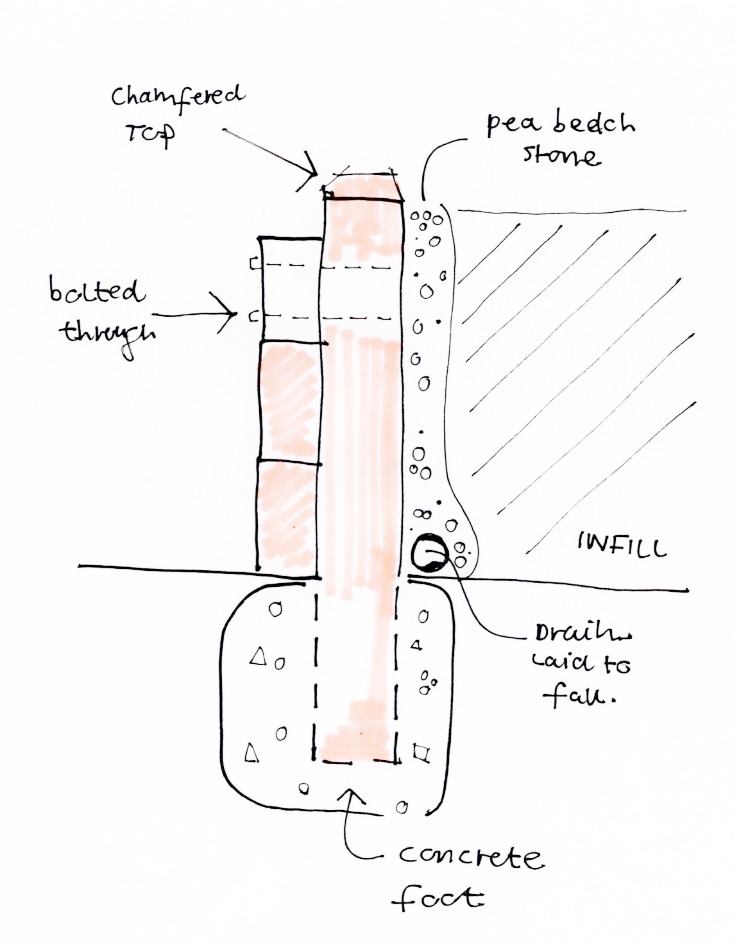
13. Finishing
Sand down any rough edges. With a sander or planer you can also chamfer the tops of the uprights, a small detail that helps rain run off and prevents rot.
We hope this guide is useful and perhaps inspires you to build your own. If any step needs clarifying, or you would rather we designed and built it for you, do get in touch.